This post may contain affiliate links.

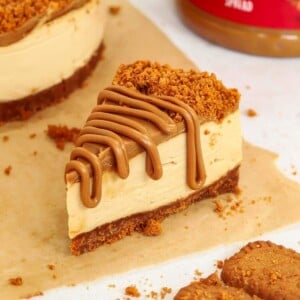
This dreamy, creamy Biscoff Cheesecake is a super impressive treat but with just 5 INGREDIENTS. No skill, no baking, no faff required! You have to try this one, but don’t blame me when you can’t stop eating it…
You know I LOVE no-bake cheesecakes and have so many different flavours in my collection.
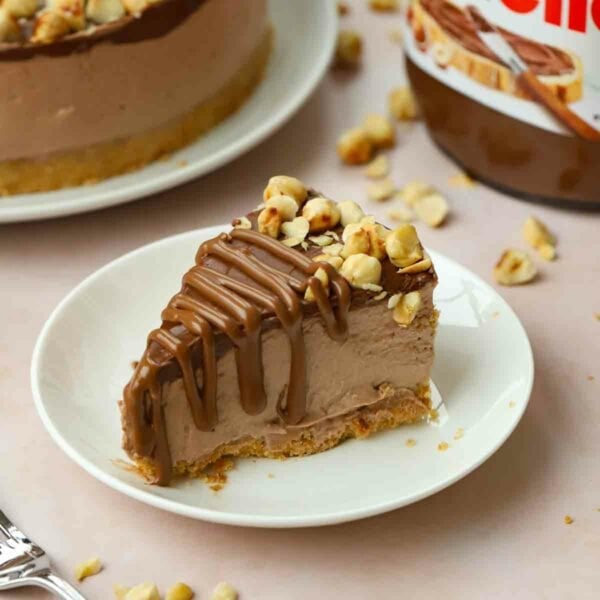
This one was originally based on my Oreo Cheesecake and my Nutella Cheesecake. These are both BIG cheesecakes, and I really wanted to come up with something this year that was:
⭐️ A delicious easy-to-make dessert for a party or crowd.
⭐️ Very low effort.
⭐️ Reasonably affordable.
SO… here is my Biscoff Cheesecake, which ticks all of those boxes and more!
Why you’ll love this Biscoff Cheesecake recipe
⭐️ Simple ingredients + super easy method = great for beginners
⭐️ A show stopping impressive dessert
⭐️ Make ahead for convenience
I won a Bake Off at my work with this recipe! Was very easy to make 🙂
About Biscoff Cheesecake
Biscoff cookies are delicate, small-crumb delights that were created in 1932 and continue to be made in Belgium by a family business to this day. Meanwhile the spread with the same flavour has taken the internet by storm (try my Biscoff Cake with it too!)
When testing this recipe, we decided to use Lotus Biscoff spread to not only sweeten it (so no need for more sugar), but also decorate it. This means fewer ingredients and processes = WIN!
After a few trials, we also refined the ingredients list to use one full jar of Biscoff so there’s also no waste. Hurrah for 5 ingredient recipes!
This cheesecake is also slightly shallower than some of my other ones (to keep it affordable), but still has the perfect ratio of biscuit base vs cream filling vs topping.
Biscoff Cheesecake Ingredients
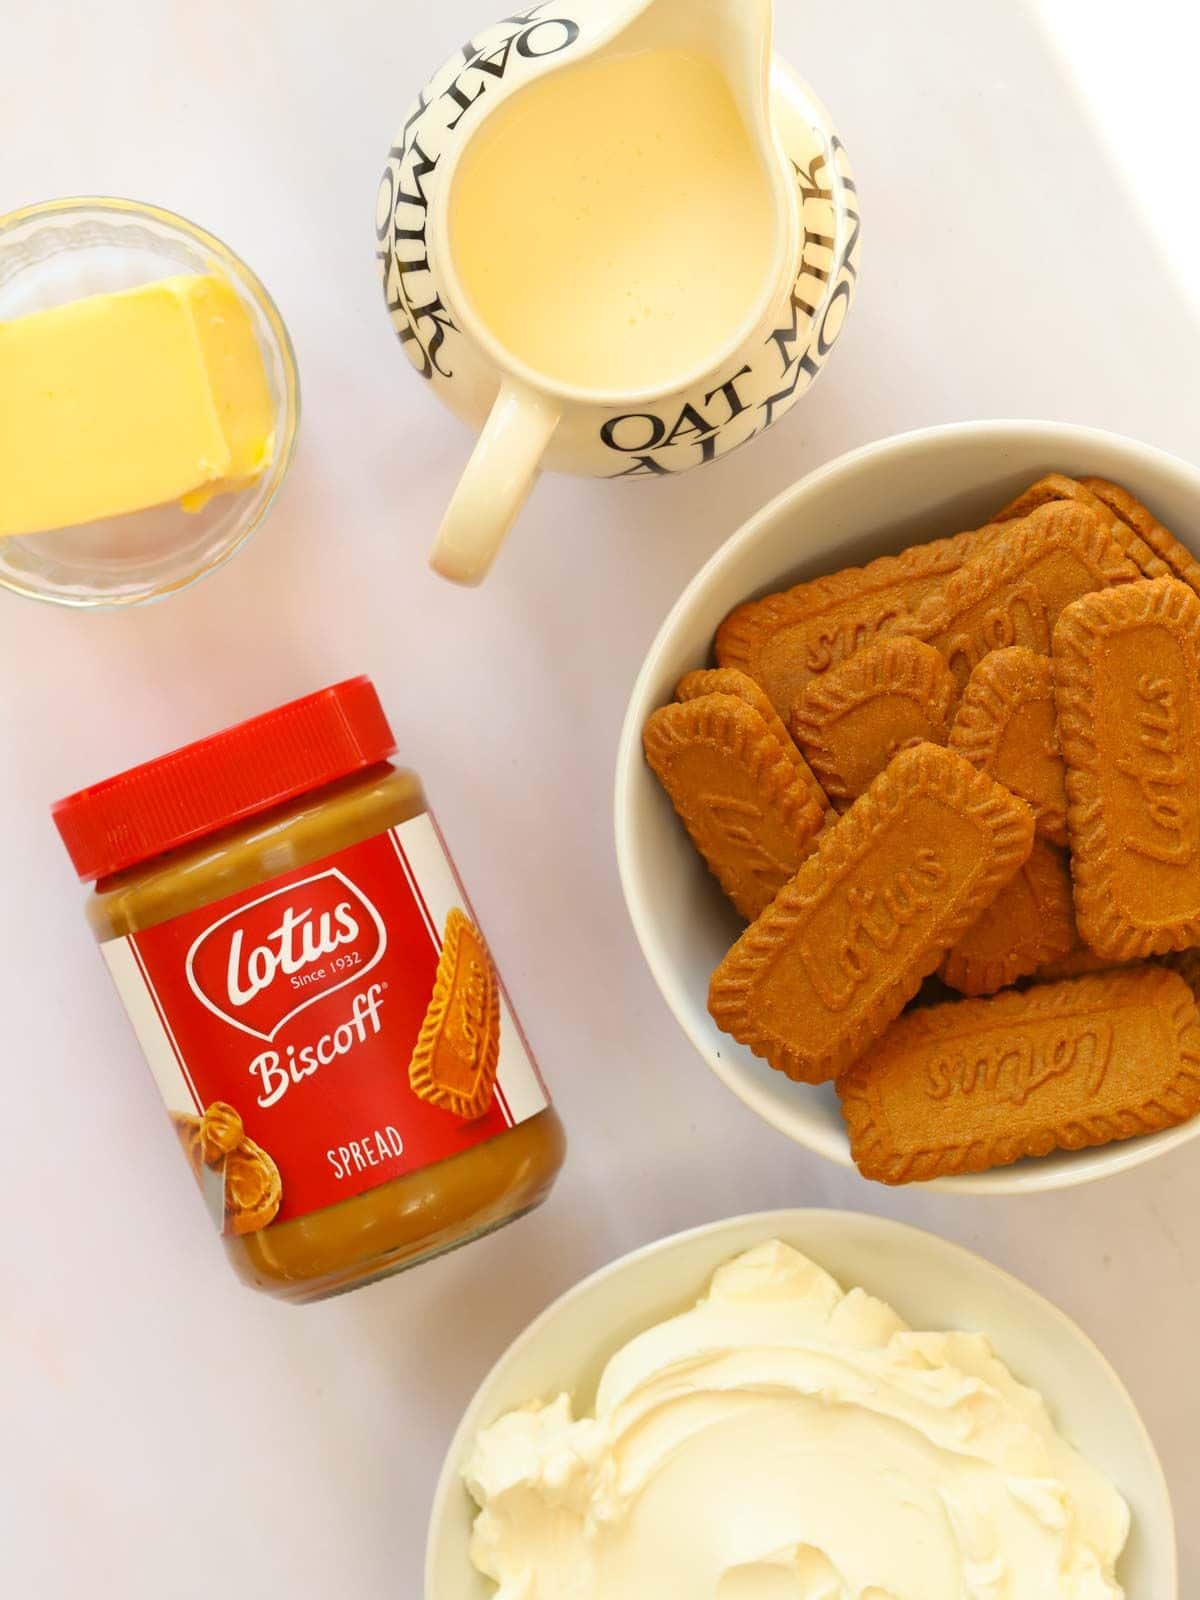
For the base:
- Biscoff biscuits – We’re going to crush these up.
- Unsalted butter – Melt this quickly in a mug in the microwave.
For the cheesecake filling:
- Double cream – See tips below on the required whipping consistency. Outside the UK? Use heavy whipping cream (if you’re in USA or Canada, with minimum 35% fat) or thickened cream (if you’re in Australia.) Do not use single cream or half-and-half.
- Full fat cream cheese – I like to use Philadelphia brand cream cheese for this recipe. You can use other brands, but I find they are SLIGHTLY more difficult to combine. Light, reduced-fat, or lactose-free versions contain more water and will prevent the cheesecake from setting.
- Biscoff spread – OBVIOUSLY!
For the topping:
- Biscoff spread – This will be very slightly melted.
- Biscoff biscuits – Again, to be crushed.
How to make Biscoff Cheesecake
1. Mix together the crushed biscuits and melted butter. Press the mixture into a tin and pop into the fridge to chill.
2. Whisk the cream cheese, double cream and Biscoff spread together until very thick.
3. Add the mixture to the base that’s been in the fridge. Refrigerate as per the recipe below.
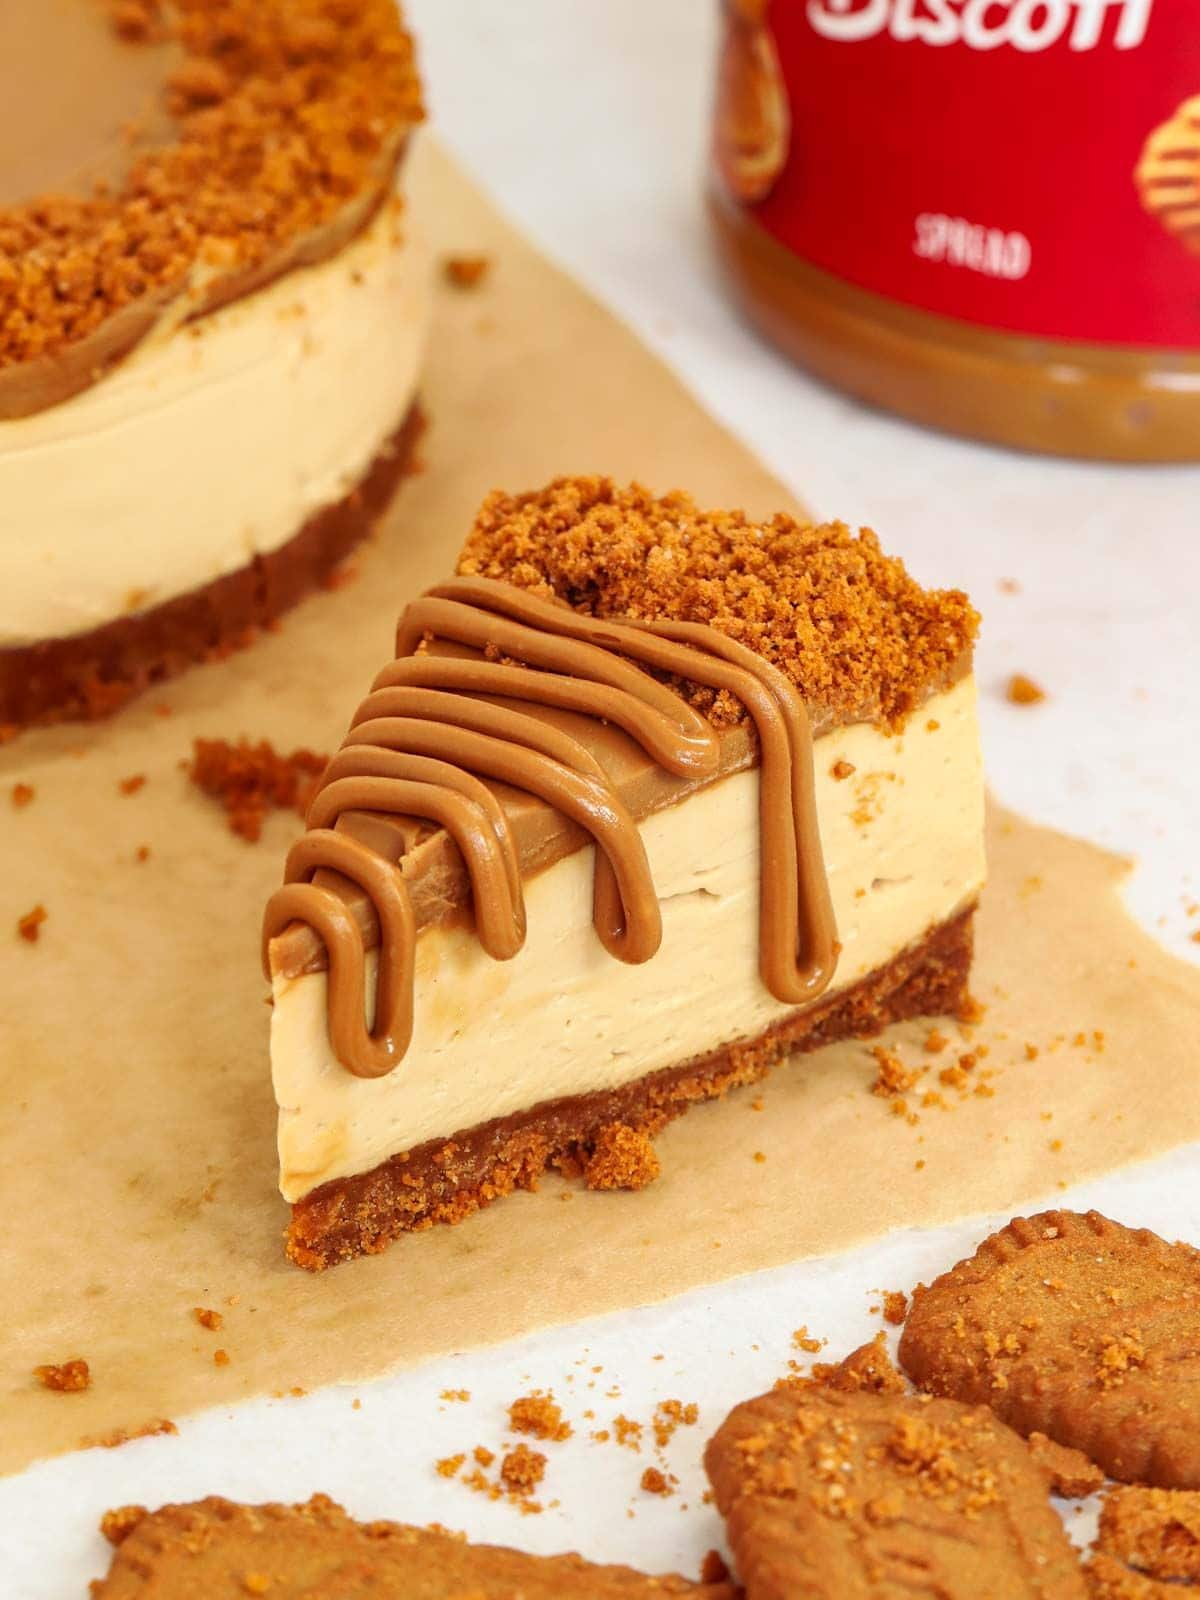
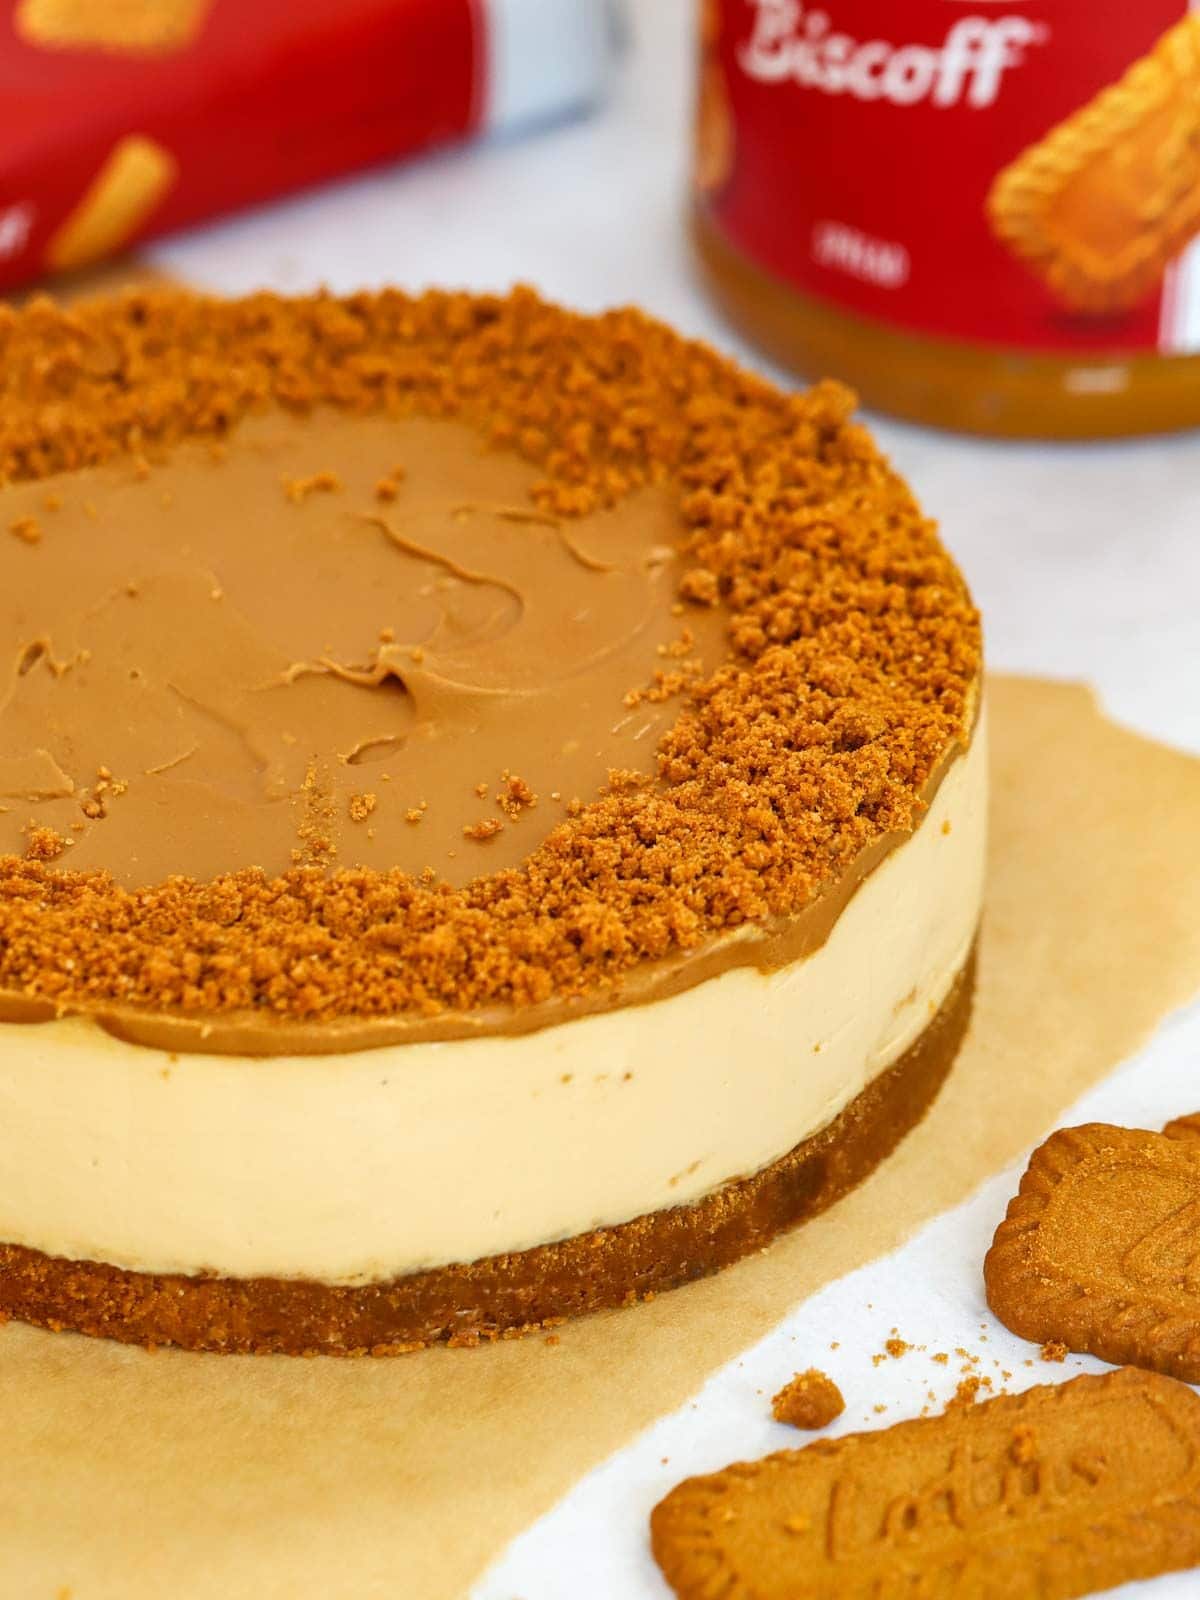
4. When almost ready to serve, melt the Lotus Biscoff spread gently in a pan or microwave. While still warm, pour over the cheesecake and smooth evenly. Crumble remaining biscuit over.
Hint: Whip the cream straight from the fridge (this helps to keep it stable) and whip enough so it holds its shape (to the texture of ice cream).
Storing the cheesecake
Chilling the biscuit base while you’re making the cheesecake filling will allow it to set and firm up a bit, making it a bit less crumbly when you add the topping.
You can store the cheesecake in the fridge (without the topping) for a MINIMUM of 4 hours and up to 3 days from preparation. The results will be much better if it’s had time to chill overnight.
Leave it in the tin in the fridge and cover with a dinner plate of cling film (but make sure it doesn’t touch the surface of your beautiful cheesecake!)
Can cheesecake be frozen?
You can also put the undecorated cheesecake in the freezer in the tin if you want to make it further in advance. Just make sure you defrost it properly in the fridge (again, in the tin) for 24 hours or until completely thawed, then decorate.
Top Tips
Whipping the cream
Make sure you whip the cream straight from the fridge as room temperature cream doesn’t whip as well. Be sure to whip it enough so that it holds its shape – more like the texture of ice cream. HOWEVER, don’t over-whip it or it can split! (Use an electric whisk if you have one.)
Removing the no bake cheesecake from the tin
Use a tin with either a springform pan (unclippable sides) or removable base (I like these Masterclass 7″ Removable Base tins that I’ve had for years). Warm a regular dinner knife under a hot tap and then dry it. Use this to run around the outside of the cake, inside the tin, before removing it. Remove the knife and wipe as you work your way around the cake.
If you have a removable base, sit the tin on a tall glass and carefully press down so the sides of the tin can slip down lower than the cheesecake and you can easily remove it.
Melting your Biscoff spread
Melt this very gently in the pan so it loosens up. Don’t let it get too hot but warm enough to pour over the top of the cheesecake until it’s covered all over.
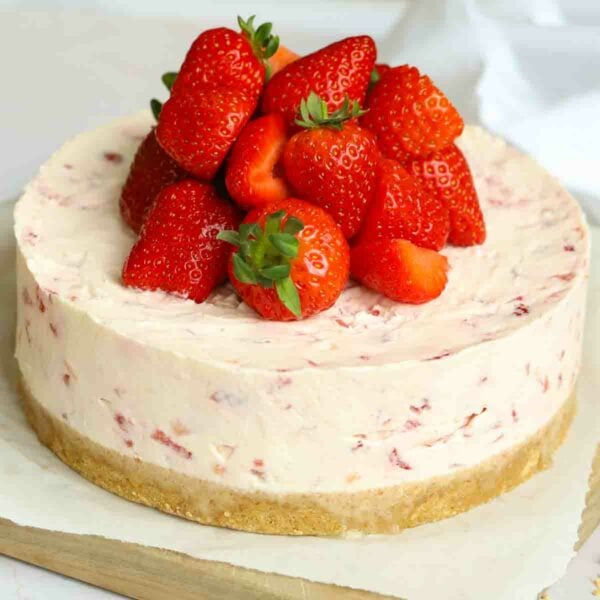
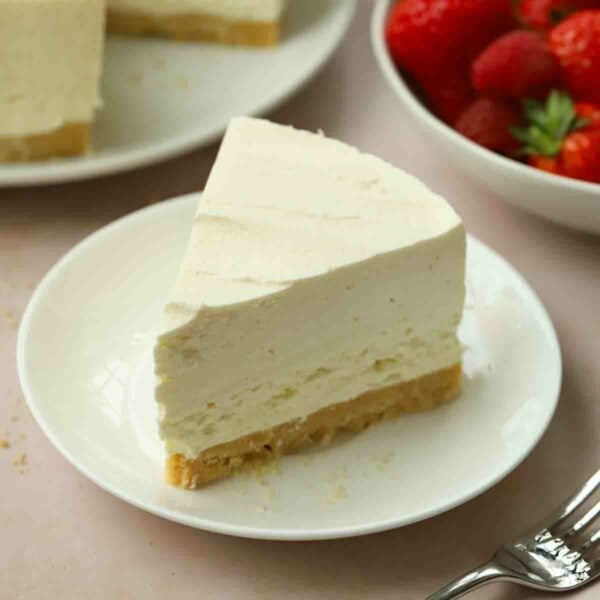
More easy Cheesecake recipes…
Cheesecakes
Nutella Cheesecake (No Bake!)
Cheesecakes
Strawberry Cheesecake {Easy No Bake Recipe}
Cheesecakes
Vanilla Cheesecake

Cheesecakes
Dubai Chocolate Cheesecake
FAQs
If it’s too runny it’s probably because your cream wasn’t whipped quite enough – it needs to hold its shape (like ice cream) before adding to your base.
No problem – pop it into the freezer for a few hours before serving. This also might happen if you haven’t left it to go cold enough in the fridge in between steps, or if you’ve not used full fat cream cheese, or if you haven’t whipped the cream straight from the fridge.
This is a shallower cheesecake than I usually make but I’d still recommend this 7″ tin, which will give you plenty of room and is very easy to use. You can use smaller or larger tin or a different shape, but your cheesecake will obviously be taller or shorter than the ones in the pictures.
Let me know how you got on and what you thought of these recipes. Please rate the recipe using the ⭐️ below.
Also I’d LOVE to see your cooking creations. If you’d like to share yours with me, you can tag me on Instagram (@tamingtwins).
Biscoff Cheesecake {5 Ingredients!}
Ingredients
For the base:
- 200 g (7 oz) Biscoff biscuits , Crushed
- 80 g (3 oz) Unsalted butter, Melted
For the cheesecake mixture:
- 300 ml (1.25 cups) Double cream (heavy whipping cream/thickened cream), See notes
- 400 g (14 oz) Full fat cream cheese
- 200 g (7 oz) Biscoff spread
For the topping:
- 150 g (5 oz) Biscoff spread, Melted
- 50 g (2 oz) Biscoff biscuits, Crushed
Instructions
- Make the base: Combine the crushed biscoff biscuits with the melted butter and press into a 18cm (7") springform pan (US)/loose-bottomed tin (UK). Chill in the fridge while you make the topping.
- Make the creamy filling: Pour the cream straight from the fridge into a bowl, add the cream cheese and Biscoff spread. Whisk until it's very thick – almost the consistency of ice cream. Use an electric whisk if you have one.
- Assemble the cheesecake: Remove the base from the fridge and add the cheesecake mixture, smoothing the top.
- To set: Pop into the fridge for at least 3 hours (or overnight is much better if you don't need it until the next day).
- Before serving, prepare the topping: When you are almost ready to serve the cheesecake, melt the Biscoff spread very gently in a pan. (Don't let it get hot.) Crush the Biscoff biscuits finely.
- To finish: Remove the cheesecake from the fridge and, while still in the tin, pour the melted Biscoff over the top. Smooth it out very gently with the back of a spoon, until the top is completely covered. (Take care not to touch the cheesecake mixture.) Sprinkle the remaining crushed biscuits around the edge.
- Set again: Return the cheesecake to the fridge for at least a further hour if you have the time. You could cut it sooner but it won't be as neat.
- To remove the cheesecake from the tin: Run a warmed dinner knife around the outside of the cheesecake, inside the tin, before removing it. Remove the knife and wipe as you work your way around the cake. Sit the tin on a tall glass and carefully press down so the sides of the tin can slip down lower than the cheesecake and you can easily remove it. For clean slices, dip your knife in hot water and wipe dry between each cut.
Did you make this recipe? Click here to let us know how it went and give it a ⭐️ rating! Your feedback helps us to make more recipes you really want.
Notes
Nutrition
Nutrition information is automatically calculated, so should only be used as an approximation. Nutritional values are per portion unless otherwise stated.
This post was originally published on July 14, 2023 and updated later to make improvements.


Hi there
I can I do the topping in advance and put it in the fridge for a few hours before serving?
Hi JEss, you can store the cheesecake in the fridge (without the topping) for a MINIMUM of 4 hours and up to 3 days from preparation. The results will be much better if it’s had time to chill overnight. Once ready to serve follow from step 6 – Remove the cheesecake from the fridge and, while still in the tin, pour the melted Biscoff over the top. Smooth it out very gently with the back of a spoon, until the top is completely covered. (Take care not to touch the cheesecake mixture.) Sprinkle the remaining crushed biscuits around the edge.
Both of my daughters have requested this instead of a traditional birthday cake for their last two birthdays, my fourth time making this today in readiness for tomorrow and a dream to whip up as usual.
Hi Danielle, what a gorgeous compliment that our cheesecake was chosen over birthday cake two years running, and now a fourth bake! So pleased it’s such a hit and a dream to whip up. Thanks so much for sharing, and happy birthday to your daughters!
hello
Such an easy dessert to make. Thank you so much for sharing – I’ve made it a couple times now and everyone is crazy for it!
There’s no better sign than making it more than once, we are so pleased it’s gone down well with everyone, Julie. Thanks for the lovely review!
Best cheesecake recipe and easiest a big winner every time I make it
I made this cheesecake for the family .It was delicious and everyone loved it.
We are so pleased it went down well with the whole family, Linda. There’s no better seal of approval than everyone loving it. Thanks very much for taking the time to leave such a lovely five star review!
It was delicious, a tad bland and it didn’t set because of the absence of gelatine. I added at least 3/4 of sugar to the cheesecake mixture otherwise it would just taste like cream cheese. But lovely idea. Thanks my kids enjoyed it 😊
Thanks for the lovely review MamaYo!
I made two, and edited a little bit to make a bit more sweeter! But it was my first time making a cheesecake, and it turned out fabulous.
Thanks for the lovely review Prabhleen!
how many days in advance can I make the cheesecake? I have a party Saturday but am busy tomorrow (friday) so can I make it today (thursday)
I have made it before and it is delicious! I am making it on saturday for my cousin as it is his birthday and it is his favourite ever dessert!
Hi Ally, you can store the cheesecake in the fridge (without the topping) for a MINIMUM of 4 hours and up to 3 days from preparation.
Hi, you give ingredience but you dont give quantities. whats with that.
Hi Trevor, all ingredient amounts are listed in the recipe. If you press ‘jump to recipe’ it will take you there